General
About
Public folders are created to collect, organize and share information with others. Typically, public folders are used by project teams or user groups to share information on a common area of interest. The owner of a public folder can set privileges so that only a selected group of users have access to the folder, or the folder can be made available to everyone on the network who uses the same mail server. Privileges can have different levels users can view, read, modify, delete files, create new folders (or delete existing ones) within the public folder they have access granted to, etc.
Selecting the Public Folders node General tab presents a list of defined public folders.
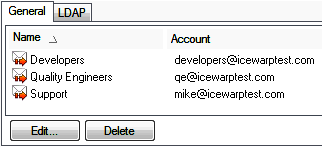
Figure. On-server Setup.
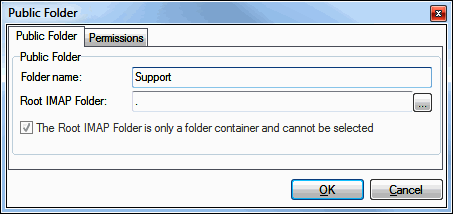
Figure. Public Folder tab.
Permissions Tab
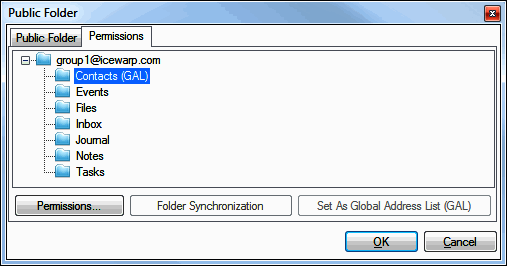
Figure. Permission tab.
Selecting the Permissions tab presents a list of folders - both groupware and IMAP ones.
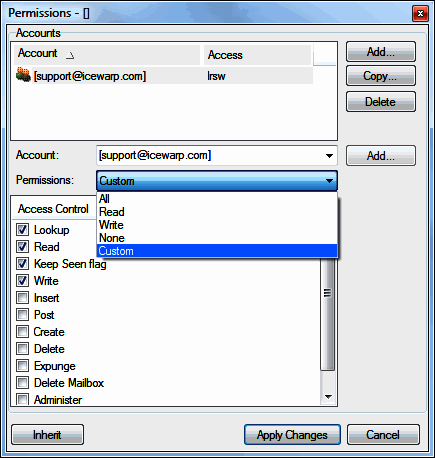
Figure. Permission tab.
| Field |
Description |
|---|---|
|
Account/Access |
List of individual members with their access rights. |
|
Add |
Click the button to open the Select Item dialog where you can select accounts (both individual and group ones). For more details about this dialog, refer to the User Groups section. You can also fill in an account that is not in the Select Item dialog list into the Account field and click this button to add it directly. The Select Item dialog is not opened in this case. |
|
Copy |
Select an account from the list and click the button to copy the selected account rights. The Select Item dialog opens - here select a user or group you want to grant the copied rights to. |
|
Delete |
Click the button to delete an account from the Account/Access list. |
|
Account |
The selected account is shown. (Also use to select everyone.) Click the Add button next to the field to add it into the list. |
|
Permissions |
Here you can select one of mostly used rights combinations. Optional. |
|
Access Control |
Select the appropriate access rights. For detailed description of access rights in this panel, refer to the Access Rights Access Rights. |
|
Inherit |
Click the button to inherit access rights from the folder's parent. Note: If used for the root folder, no access is granted. Note: Changing of any access rights for a folder that has inherited its rights from its parent removes this inheritance. |
|
Apply Changes |
Click the button to save the performed changes. |
Creating a Public Folder
Note: The only way how to create a public folder is Checking the Create a public shared folder box when creating a group.
LDAP Synchronization
There is following kind of LDAP synchronization in IceWarp Server:
- The GroupWare - Public Folders - LDAP tab is the place where GAL is synchronized to LDAP. This is used for email clients (Outlook, Thunderbird, ...) query about the Address Book.

